lms_user_id) in OneLogin that can be used with LMS integrations. These attributes allow you to map user identities between your platform and the LMS provider.
Access OneLogin Admin Portal
1
Log in to OneLogin
Log in to your OneLogin Admin Portal at https://[your-subdomain].onelogin.com/admin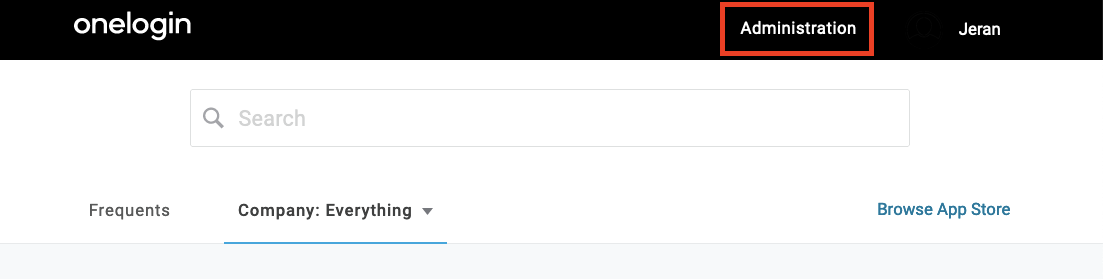
2
Navigate to Applications
In the top navigation menu, click on Applications.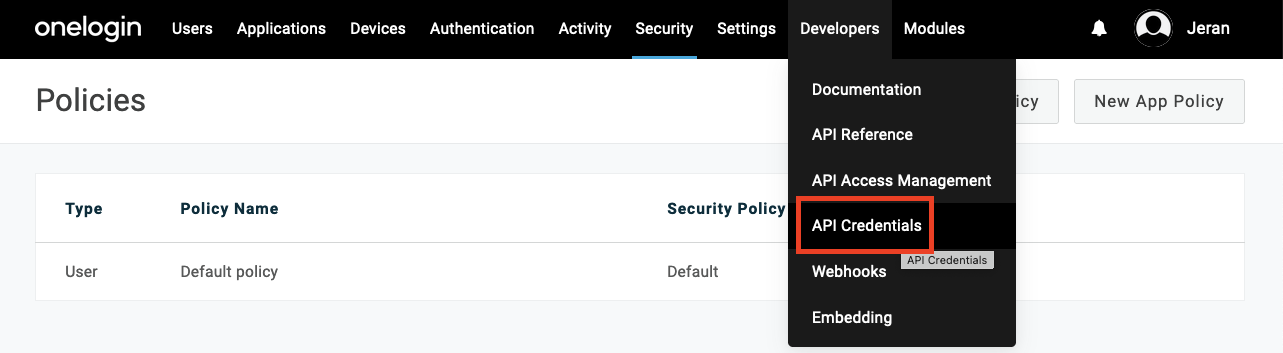
3
Select Your Application
Find and click on the application that will be used for SSO with your LMS integration.If you haven’t created an application yet, click Add App and either:
- Search for your LMS in the OneLogin App Catalog
- Create a SAML Test Connector (IdP w/ attr) for custom configuration
Configure Custom User Attributes
1
Navigate to Custom User Fields
Before configuring SAML parameters, set up custom user attributes if needed.Go to Users > Custom User Fields in the left navigation menu.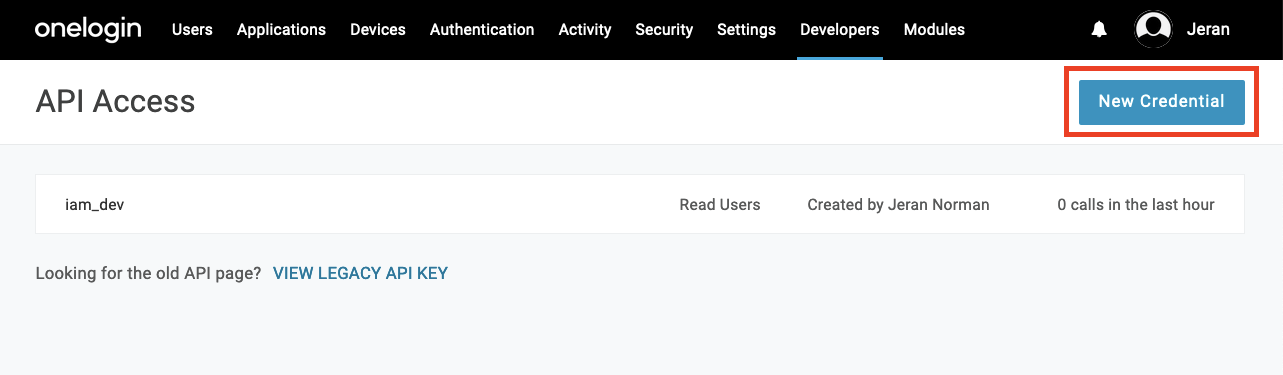
2
Add Custom Field (If Needed)
If you need a custom attribute beyond OneLogin’s standard user fields, click New User Field:
- Name:
LMS User ID(display name) - Short name:
lms_user_id(technical name) - Include in User Provisioning: Check if you want to sync this field
- Required for all users: Set based on your requirements
- Searchable: Check for easier user management
- Values: Leave blank for free-text entry
OneLogin provides many standard user fields that might be sufficient for your needs:
- Username
- Employee ID
- Manager email
- Department
- Title
- Phone numbers
- Custom fields 1-10
3
Populate User Data
Ensure that the attribute you plan to use is populated for your users:
- Via OneLogin Admin Portal: Users > Select user > Edit
- Via OneLogin API
- Via CSV import
- Via directory sync (AD, LDAP, Google Directory, etc.)
Configure SAML Parameters
1
Navigate to Parameters Tab
In your application settings, click on the Parameters tab.
2
Add Custom Parameter
Click the + button to add a new parameter for your LMS user identifier:Parameter Configuration:
- Field name:
lms_user_id(or the attribute name expected by your LMS) - Flags:
- Check Include in SAML assertion
- Check Multi-value if the attribute can have multiple values
- Default if no value selected: Leave blank or set a default
- Transform using macro: Configure the source of the data
Common macro values for LMS integrations:
{user.username}- OneLogin username{user.email}- User’s email address{user.employee_id}- Employee ID field{user.custom_field_lms_user_id}- Custom field you created- Static value or combination of fields
3
Configure Value Mapping
In the Value field, specify how to populate this parameter:Examples:
- For email-based identifier:
{user.email} - For employee ID:
{user.employee_id} - For custom field:
{user.custom_field_lms_user_id} - For username:
{user.username} - For combination:
{user.firstname}.{user.lastname}@{user.company}
4
Add Additional Parameters (Optional)
Create additional parameters as needed by your LMS:Common additional parameters:
- first_name:
{user.firstname} - last_name:
{user.lastname} - email:
{user.email} - department:
{user.department} - title:
{user.title} - manager:
{user.manager_email} - groups:
{user.role}or custom group mapping
5
Save Configuration
Click Save to apply your parameter configuration.
Configure SAML Assertion Settings
1
Navigate to SSO Tab
Click on the SSO tab to configure SAML assertion details.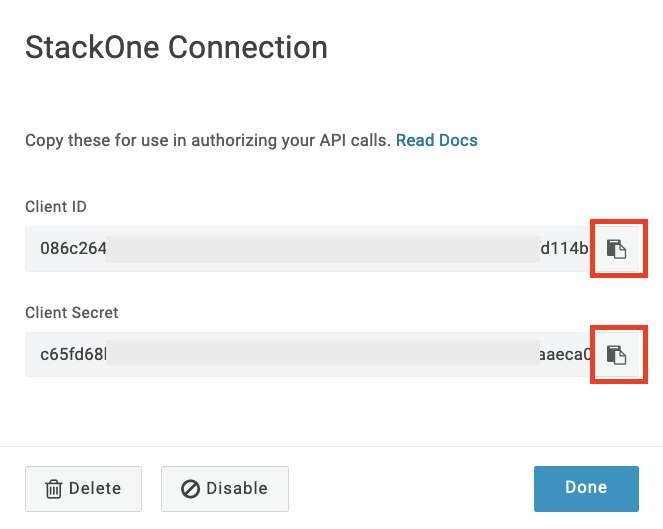
2
Configure SAML Settings
Ensure your SAML settings are configured for your LMS:
- SAML Consumer URL: Your LMS Assertion Consumer Service URL
- SAML Audience: Your LMS entity ID
- SAML Recipient: Usually the same as Consumer URL
- SAML Validator: Usually the same as Audience
3
Set Name ID Format
Configure the Name ID format based on your LMS requirements:
- Name ID format: Choose from Email, Username, UUID, etc.
- Name ID value: Map to your primary identifier (often
{user.email}or{user.username})
Configure Role and Group Mappings
1
Navigate to Rules Tab
Click on the Rules tab to set up conditional logic for attribute mapping.
2
Create Attribute Rule (Optional)
If you need conditional attribute mapping based on user properties:
- Name: Descriptive name for the rule
- Enabled: Check to activate the rule
- Conditions: Set conditions based on user attributes
- Actions: Define what attributes to set when conditions are met
3
Configure Group Mapping
If your LMS requires role or group information:
- Go to Users > Groups to manage user groups
- In your application Parameters, add a group parameter
- Use macros like
{user.role}or custom group logic
Test SSO Configuration
1
Assign Test User
Go to Users and assign a test user to your LMS application:
- Select the user
- Click Applications tab
- Click + to add your LMS application
2
Test SSO Flow
Use OneLogin’s Test functionality or initiate SSO from your LMS:
- In your application settings, click More Actions > Test
- Or use the OneLogin portal to launch the application
3
Verify SAML Response
Check the SAML response to ensure your
lms_user_id and other configured parameters are present:- Use browser developer tools to inspect the SAML POST
- Check OneLogin’s event logs under Events
- Use SAML debugging tools to decode the assertion
Advanced Configuration Options
1
Custom Attribute Mapping
For complex scenarios, you can use OneLogin’s Smart Hooks or Mappings features:
- Smart Hooks: JavaScript-based pre and post authentication hooks
- Mappings: Advanced rules for transforming user attributes
2
API-Based Attribute Updates
Use OneLogin’s API to programmatically update user attributes:
3
Provisioning Configuration
If your LMS supports SCIM provisioning, configure it under the Provisioning tab:
- Enable provisioning
- Map OneLogin fields to LMS fields
- Set up real-time user updates
Linking with Your LMS Integration
Now that you have configured the custom SSO attributes in OneLogin, you can reference these in your LMS integration setup:1
Access LMS Integration
Navigate to the integration configuration page for your specific LMS platform.
2
Configure SSO Mapping
In the SSO or user mapping section of your LMS integration, specify:
- SSO Attribute Name:
lms_user_id(or the parameter name you configured in OneLogin) - LMS Field: The corresponding field in your LMS (varies by platform)
3
Test Integration
Perform a test sync or SSO login to verify that users are being correctly identified and mapped between systems.
Congratulations, you’re all set! If you face any issues with the steps mentioned above, please contact us by emailing integrations@stackone.com. We’re always here to assist you!
LMS-Specific Attribute Requirements
Different LMS platforms may require specific parameter configurations:Common LMS Attribute Mappings
- Docebo: Use
user.user_idfor the user identifier - SAP SuccessFactors: Typically uses
user.USERIDor email-based identifier - Workday Learning: Often requires
user.employee_id - 360Learning: Usually accepts
user.mail.
Troubleshooting
- Ensure parameter names match exactly between OneLogin and your LMS configuration
- Verify that all required parameters are configured and have values for your users
- Check OneLogin event logs for SSO authentication details
- Confirm that users have the necessary attribute values populated in their OneLogin profiles
- Use OneLogin’s SAML test feature to debug attribute mapping issues
- Verify that macro syntax is correct and references valid user fields